If you’re feeling overwhelmed by all the seed starting supply options, then you’ve come to the right place. There are only a few things you need to start your seeds indoors. I can show you plenty of selections to fit any budget, and items around the house that you can repurpose for your seed starting season.
A few items you will need to get started are: proper containers, labels, markers, seed starting mix, a light source, a heat source, and water.
If you want to purchase something that has it all, you can try a fun indoor Culinary Herb Garden or Herbal Tea Garden Kit. Full kits come with a complete set of the basics: plastic container for each seed, bottom tray, and a clear plastic humidity dome. The germination kits include “jiffy pellets,” peat, or coir pots. All you need to do is make the purchase and follow the instructions. Make sure to look at the small print and see if they include seeds or if you need to purchase them as well.
Seed Starting Containers
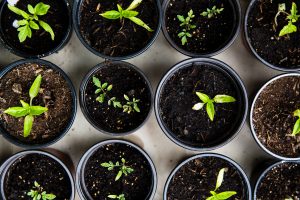
No matter what size of garden you have, you will need an assortment of 13 cell seed starting set. Depending on what I am growing, I use either large open trays or small single starter trays. Large open trays are for planting a lot of one plant (e.g. flowers). Be sure to notice whether the trays are made without holes and trays are made with drain holes. Choose small BPA free polystyrene, each sheet of these seed starter tray for single plants like tomatoes. Trays and containers are easy to use and reuse year after year. There is an upfront cost but will save you money in the long run. I use then until they are no longer serviceable, then I recycle and replace them.
Plastic Containers: I have been known to save cottage cheese containers and yogurt cups to use during my gardening adventures. When you purchase plants from a nursery, remember to keep and reuse the black (or white) pots. If you decide to reuse plastic bins, remember to clean and cut drainage holes in the bottom. Drainage holes help prevent root rot.
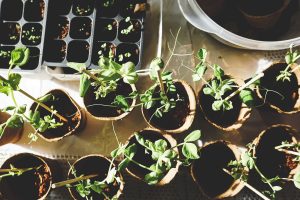
Peat pots: Peat pots break down in the soil over time, producing no waste. The idea is that they become one with the earth, and you replace them every year. I have not had much luck with these, but the technology has probably improved since I last used them. I have also seen people use paper egg trays or cartons.
Newspaper pots: The idea is similar to peat pots where you plant them directly into the ground. The beauty is that you have no waste and, over time, this can save you money. The actual newspaper pot form is kid-friendly and will last a lifetime. The benefits outweigh the cost of the time-consuming process of making your pots.
Tip: If you reuse containers, remember to clean them afterwards. Wash with a gentile kitchen soap then rinse in a solution of 1 part chlorine bleach to 10 parts water. This will kill remaining plant disease and microorganisms that could weaken or kill your tender seedlings.
Labels and markers:
The easiest solution is to purchase a set of super cute tags made of metal or plastic (there are endless options). The most cost-effective method is to look around your house and see what you can repurpose. You can also get creative and paint rocks, use old spoons, or cut up a cottage cheese container.
Clothespins: This is budget-friendly, and I usually have them in my laundry room. I use the clothespins on large trays when I plant more than one variety. I write on the clothespin and clip it to the end of each row. This keeps them dry and, I can reuse them.
Wood labels: I have used popsicle sticks, but they barely last through the seeding process. If you get thick pieces of wood, the writing may last more than one season. The smaller wood pieces in the picture are single-serve ice cream spoons from Nana’s house. Be creative, look around, and see what you already have.
I use wood labels, but by the end of the season, they are not legible. The wood labels start to disintegrate the minute they get wet. Plastic will last a few seasons, but make sure they get picked up in the fall before you put your beds to rest. Maybe next year, I will use fancy copper labels.
Markers: A permanent marker like the brand “Sharpie, “works best for me. I prefer a pointed tip allowing me to write the full name of the plant on the tiny space on the label.
Seed Starting Mix
Seed starting mixes are available online or at a local nursery, box store, or grocery store. Backyard soil carries weed seeds or other diseases and microorganisms that can harm your seedlings before they even get started. In a pinch, you can pasteurize your soil by baking it until it reaches 180 degrees for 30 minutes.
What to look for
Look for blends formulated to grow seedlings. The most common ingredients are sphagnum peat moss or coconut coir to retain water and air, vermiculite to keep soil evenly moist, and perlite or pumice for soil drainage.
Germination mix: You can make a seed starting mix yourself. All the ingredients are available at most nurseries and garden stores. There are numerous recipes (see below). When mixing make sure the ingredients are fine and uniform, yet well-aerated, loose, and free of pests, diseases, and weed seeds.
Recipe for general use: Mix one-third pasteurized soil or compost, one-third vermiculite or perlite, and one-third coconut coir. Then, add a handful of sand.
Recipe for planter trays: To fill a large tray: Mix 8 parts (pre-moistened) coco coir or peat moss, 1 part vermiculite, 1 part perlite or pumice, 1/4 tsp garden lime per gallon (if you use peat moss).
Note: A “part” is an equal unit of measure. If you use a bucket, one part equals one bucket.
Seed Starting Light & Heat Source
Light source: There are many grow lights to choose from, and it will depend on how much space you have. A south-facing window is preferable and the cheapest option. Traditional lighting is white fluorescent bulbs, and the newest is fourteen watt LED grow light.
Heat source: to assist with seed germination, many people find success using a heat mat, heating cables or coils. It is even more preferable to have a greenhouse or sunroom.
Water
The source of the water is essential as many municipal systems have heavy chlorination. To avoid the chloronation, try spring or well water. Letting a bucket of water sit for 24 hours will also dissipate the chlorine. In the beginning, keep your starts covered with a humidity dome or cloth to keep them moist. Use a spray bottle or watering can with a showering head to gently water the seedlings daily.
Finally, you will want a water-resistant journal to keep track of your plants, details of your successes, and reminders for next year. I keep all of my seeds and supplies together in a plastic bin. To make it easy for me to grab and go and make my garden plan anywhere.

Starting seeds is easy and the most cost-effective way to garden. Once you have some supplies, you are set up for next season. Remember gardening is a journey.
~Janine
What seeds are you going to start with your new supplies?
Take advantage of this True Leaf Market coupon for free shipping on orders over $50.


